Scratches on your car’s dashboard are more than just minor cosmetic issues. Whether caused by sharp objects, pets, or everyday wear and tear, these blemishes can make your car’s interior look worn out and neglected. More importantly, they can reduce your vehicle’s resale value and create the impression of poor maintenance. Fortunately, there are several effective methods to remove these scratches, from light scuffs to deeper gouges. In this guide, we’ll explore how you can remove scratches from your car dashboard using simple, DIY techniques as well as some professional tips.
To remove scratches from your car dashboard, clean the surface, apply heat or polish for light scratches, and use fillers for deeper ones. Finish by buffing the area smoothly.
What’s Dashboard Scratches?

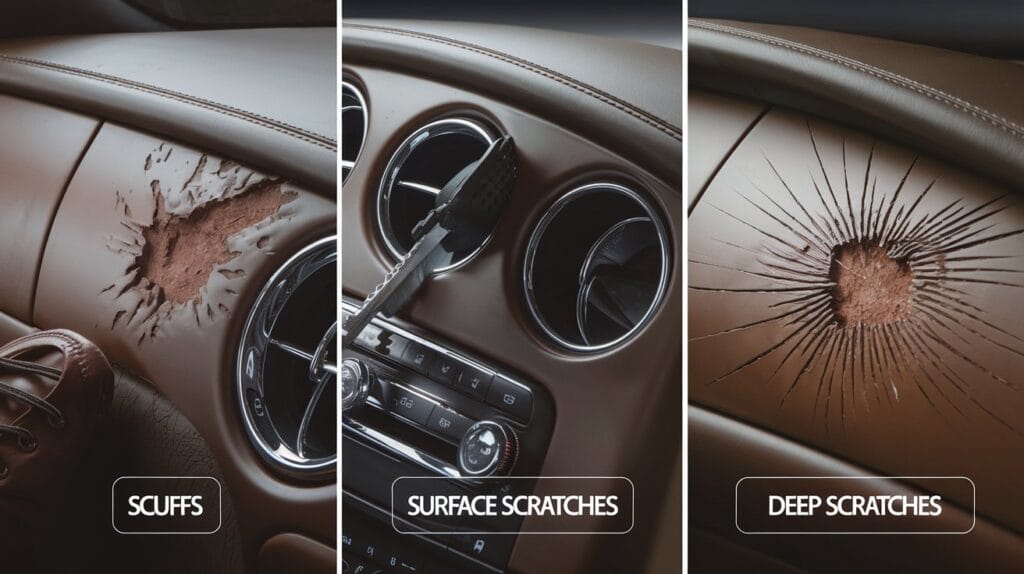
Before diving into the solutions, it’s important to understand the types of scratches you might be dealing with. Dashboard materials can vary, and each material may react differently to scratches. Here’s a breakdown:
- Scuffs: These are surface-level marks usually caused by shoes, bags, or other soft objects. Scuffs don’t penetrate deeply into the material and are often the easiest to remove.
- Surface Scratches: These are shallow but noticeable scratches caused by sharper objects like keys or nails. They only affect the top layer of the dashboard.
- Deep Scratches: These penetrate deeper into the dashboard material and can sometimes expose the inner layers, especially on older dashboards. They require more advanced techniques for repair.
Why Removing Scratches Matters
Aside from aesthetics, removing scratches helps preserve the value of your vehicle. Scratches can lead to further damage over time, especially when exposed to sunlight, which can cause dashboard materials to crack or discolor. Addressing scratches early can prevent bigger problems down the road.
Tools and Materials You Will Need

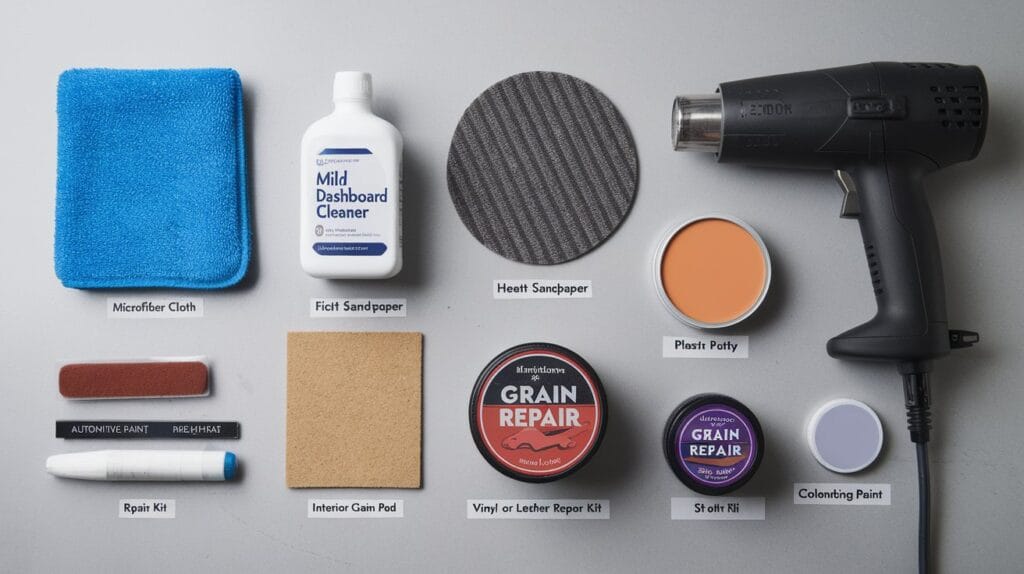
To effectively remove scratches from your dashboard, you’ll need the right tools and materials. Here’s a quick rundown of what you’ll need:
- Microfiber cloths: To clean and buff the area.
- Mild dashboard cleaner: Ensures the area is clean before any repair.
- Heat gun or hair dryer: Helps soften plastic and vinyl dashboards for easier repair.
- Fine-grit sandpaper: For deeper scratches that need smoothing out.
- Plastic putty: Used to fill deep scratches.
- Interior grain pad: For restoring texture on dashboards with patterned surfaces.
- Automotive polish or scratch remover: Helps buff out minor scratches.
- Vinyl or leather repair kits: Necessary if your dashboard is made of these materials.
- Color-matching paint: For restoring the original color after deep repairs.
Also Read: Why Is My Car Shaking? Discover the Shocking Reason Now!
Step-by-Step Guide: How to Remove Scratches from Car Dashboard

Step 1: Clean the Dashboard
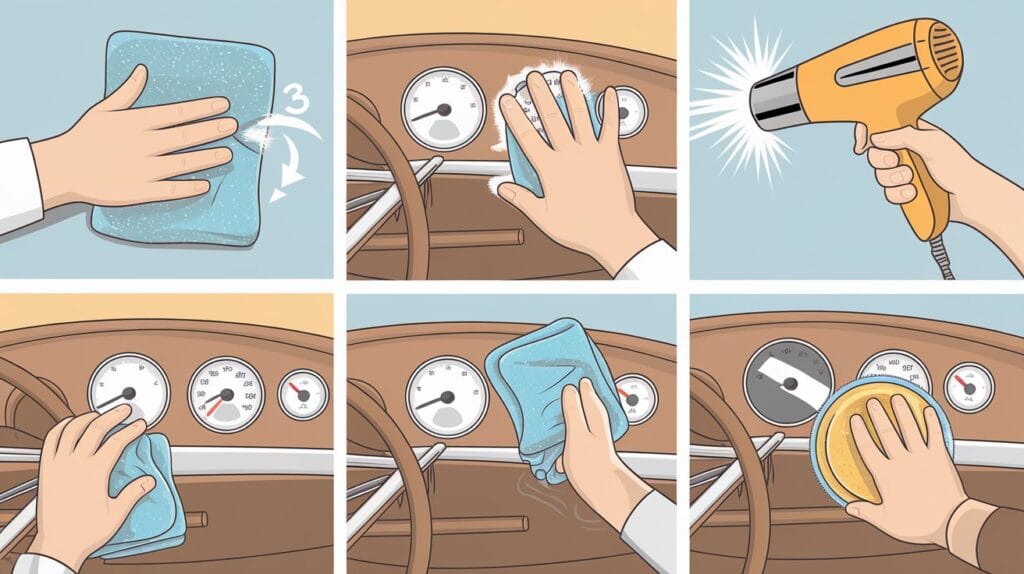
The first step in any scratch repair process is to thoroughly clean the dashboard. This removes any dust, grime, or debris that could interfere with the repair. Use a microfiber cloth and a mild dashboard cleaner to gently clean the area.
- Tip: Avoid using harsh chemicals or abrasive cleaners, as they can further damage your dashboard. A specialized dashboard cleaner designed for your dashboard material (plastic, vinyl, or leather) is best.
Step 2: Identify the Scratch Type
After cleaning, assess the depth and severity of the scratch. This will help you choose the appropriate repair method:
- Light Scuffs: These can usually be buffed out easily with a scratch remover or polish.
- Surface Scratches: Require more effort, such as heat treatment or gentle sanding.
- Deep Scratches: May need plastic putty, retexturing, and sometimes color-matching paint.
Step 3: Remove Surface Scratches with Heat and Buffing
For plastic and vinyl dashboards, heat can be a quick and effective method to remove scratches.
- How to Apply Heat:
- Use a heat gun or hair dryer on the scratched area.
- Hold the heat source about 6-12 inches from the dashboard, moving it in small circular motions.
- Be careful not to overheat, as this can warp or damage the plastic.
- As the material softens, use your fingers or a tool to press the edges of the scratch together, smoothing it out.
- Allow the dashboard to cool, and then gently buff the area with a microfiber cloth and some automotive polish.
This method works well for plastic and vinyl dashboards with light to moderate scratches. However, it may not be sufficient for deeper scratches.
Step 4: Fix Deeper Scratches with Sanding and Filling
Deeper scratches require a more involved process, especially if the scratch has penetrated into the lower layers of the material.
- Sanding:
- Start by gently sanding the scratched area using fine-grit sandpaper (800-1200 grit).
- Move in a circular motion, applying light pressure to avoid damaging the surrounding area.
- After sanding, clean the area with a microfiber cloth to remove any dust.
- Filling the Scratch:
- Apply plastic putty or filler to the scratched area.
- Use a flat tool, like a plastic putty knife, to smooth the filler into the scratch.
- Let the filler dry according to the product’s instructions.
- Retexturing:
- Once the filler has dried, you may need to retexture the area to match the surrounding dashboard. This can be done using an interior grain pad, which you press against the filled area to recreate the original texture.
- Painting:
- If the scratch has affected the color, use color-matching paint to touch up the area. Apply in thin layers and allow each layer to dry before adding more.
Step 5: Buff and Polish the Dashboard
Once the repair is complete, use a polishing compound to buff the entire area. This will restore the dashboard’s original shine and blend the repaired area with the rest of the dashboard.
- Tip: Use a circular motion with a microfiber cloth to achieve a smooth finish. If needed, apply a dashboard protectant to keep the area looking fresh and to prevent future scratches.
Special Cases: Different Materials Require Different Methods

Different dashboard materials require specific care. Here’s how to handle each:
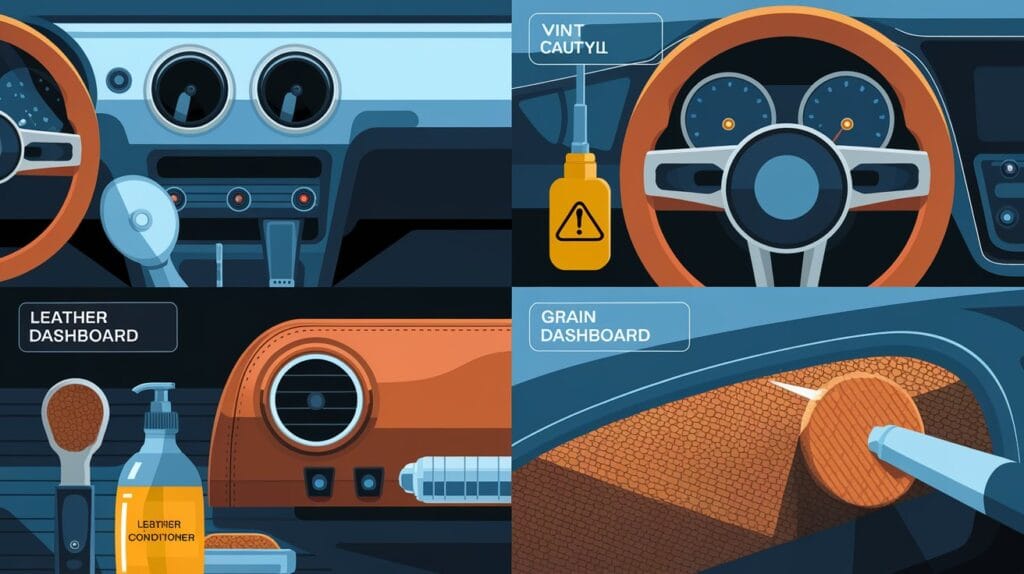
- Plastic Dashboards: These are the most common and can usually be repaired using heat and buffing methods. Plastic putty works well for deeper scratches.
- Vinyl Dashboards: Similar to plastic, vinyl can be softened with heat and smoothed out. However, vinyl is more flexible, so be cautious not to overstretch it when applying heat.
- Leather Dashboards: Leather is more delicate and requires specialized repair kits. For small scratches, a leather conditioner may be enough. For deeper scratches, a leather repair kit with color-matching filler is essential.
- Textured Dashboards: Retexturing is necessary after repairs on dashboards with patterns or textures. Use grain pads to imprint the original texture back into the repaired area.
Preventing Future Scratches
Once you’ve removed the scratches from your dashboard, it’s a good idea to take preventive measures to keep your interior looking pristine:
- Regular Maintenance: Clean your dashboard regularly with a microfiber cloth and a dashboard cleaner to prevent dust buildup, which can cause fine scratches over time.
- Use Dashboard Protectants: Apply a protective layer of dashboard protectant, such as Aerospace 303 or Prima Nero, to prevent UV damage and reduce the risk of scratches.
- Avoid Sharp Objects: Keep keys, pens, and other sharp objects away from the dashboard. Store them in compartments to prevent accidental scratches.
- Use Dashboard Mats or Covers: Consider using a dashboard mat or cover to provide an extra layer of protection. While some may not like the look, they can be easily removed when needed and prevent damage from daily wear and tear.
Also Read: Top Secret Spots: Where to Sell Your Tesla for Maximum Profit
When to Seek Professional Help
While most minor scratches can be fixed using the methods outlined above, there are cases where it’s best to leave the repair to a professional:
- Deep gouges or cracks: If the scratch is too deep or involves cracking, a professional can ensure the repair is seamless and long-lasting.
- Textured dashboards: Retexturing requires skill, especially if the pattern is complex. A professional can perfectly match the original texture.
- Leather repairs: Leather dashboards, especially in luxury cars, can be tricky to repair without the right tools and expertise. A professional leather repair service can handle these cases with precision.
Conclusion
Scratches on your car dashboard may seem inevitable, but with the right tools and techniques, you can restore your dashboard’s original appearance. Whether you’re dealing with minor scuffs or deep scratches, the methods outlined in this guide will help you remove the damage and keep your car looking its best. By maintaining your dashboard and preventing future scratches, you can preserve the value and aesthetic of your vehicle for years to come. Now, you no longer have to worry about those unsightly scratches – just take action and get your dashboard looking as good as new!
FAQs
Yes, toothpaste can act as a mild abrasive for light surface scratches on plastic dashboards. Apply a small amount on a soft cloth and rub gently in circular motions. However, this method is only effective for very minor scratches and may not work on deeper marks.
While dashboard protectants can help reduce the likelihood of scratches by adding a protective layer, they won’t completely prevent damage from sharp objects. Regular cleaning and careful handling of objects inside your car will further reduce the risk of scratches.
Yes, but only with fine-grit sandpaper (800-1200 grit) and for deeper scratches. Sand very gently and use it only on plastic dashboards. Always follow up with polishing to restore the smooth surface. Avoid using sandpaper on leather or textured surfaces as it can cause more damage.
While deep scratches can be improved significantly, completely removing them might require professional repair services. DIY methods like filling with plastic putty and retexturing can help, but the result may not be perfect if the scratch is very deep.