When it comes to protecting your vehicle foam bumpers have become a popular choice among car owners. Not only do they safeguard your car from minor impacts and scratches. But they also help avoid costly repairs from everyday mishaps. Whether you’re parking in tight urban spaces or simply want added peace of mind, foam bumpers offer a lightweight yet durable solution.
But the big question remains, How much does it cost to install a foam bumper on your car? The answer depends on various factors such as materials, labor and the installation method. This guide provides a comprehensive breakdown of the costs and benefits, helping you make an informed decision.
The cost to install a foam bumper on a car typically ranges from $50 to $150 for DIY and $200 to $850 for professional installation. Factors like material type, car model and labor fees influence the price. Choosing between DIY or professional depends on your budget and expertise.
What is a Foam Bumper and Why Should You Install One?

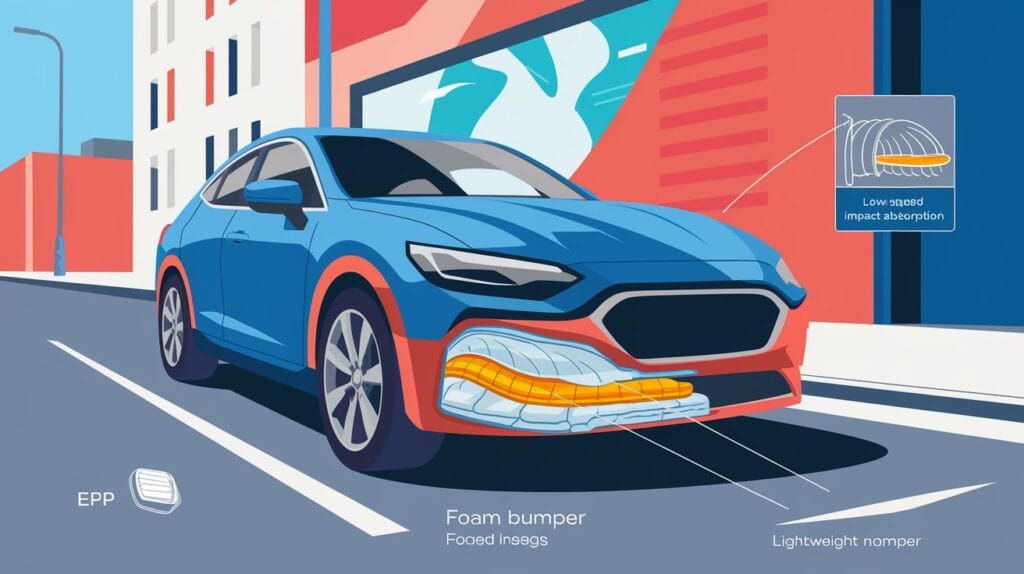
A foam bumper is a lightweight yet durable car accessory designed to absorb impact and minimize damage during low-speed collisions. Made from advanced materials such as polyurethane or expanded polypropylene (EPP), foam bumpers act as a cushioning layer to protect the car’s structure.
Benefits of Foam Bumpers:
- Impact Absorption: Foam bumpers are designed to disperse the energy from minor collisions, reducing damage to the vehicle’s body and frame.
- Lightweight: Unlike traditional metal bumpers, foam bumpers do not add significant weight, helping maintain your car’s fuel efficiency.
- Cost-Effective: They provide an affordable way to protect your vehicle from daily wear and tear.
- Aesthetic Enhancement: High-quality foam bumpers seamlessly blend with your car’s design, maintaining its visual appeal.
For urban drivers and those with tight parking spaces, foam bumpers are an ideal solution for avoiding expensive repairs from minor scrapes and bumps.
Factors Affecting Foam Bumper Installation Costs
| Material Type | Cost Range | Durability | Key Benefits | Best For |
|---|---|---|---|---|
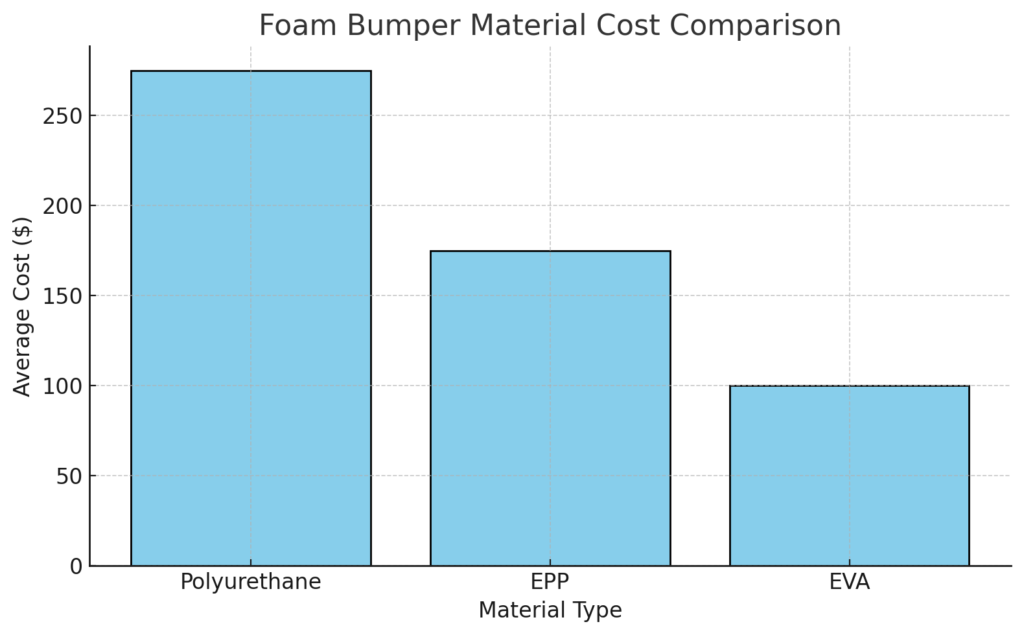
| Polyurethane Foam | $150 – $400 | High | Flexible, long-lasting, heavy-duty | Long-term protection |
| Expanded Polypropylene (EPP) | $100 – $250 | Medium | Lightweight, absorbs impact well | Budget-conscious owners |
| EVA Foam | $50 – $150 | Low | Affordable, flexible | Short-term or light usage |
Several factors influence the total cost of installing a foam bumper. These include material type, car model, installation method and additional modifications. Let’s explore each factor in detail.

1. Material Type and Quality
Foam bumpers come in different materials, each offering distinct advantages and price points:
- Polyurethane Foam: Known for its flexibility and durability, this material is ideal for long-term use. Expect to pay between $150 and $400 for a polyurethane foam bumper.
- Expanded Polypropylene (EPP): Lightweight and budget-friendly, EPP bumpers cost around $100 to $250. They offer decent impact resistance but may need replacement sooner than polyurethane options.
- EVA Foam: Ethylene-vinyl acetate is the most affordable, with prices ranging from $50 to $150. However, its durability is lower compared to other materials.
Choosing the right material is essential for balancing cost, performance and longevity.
2. Car Make and Model
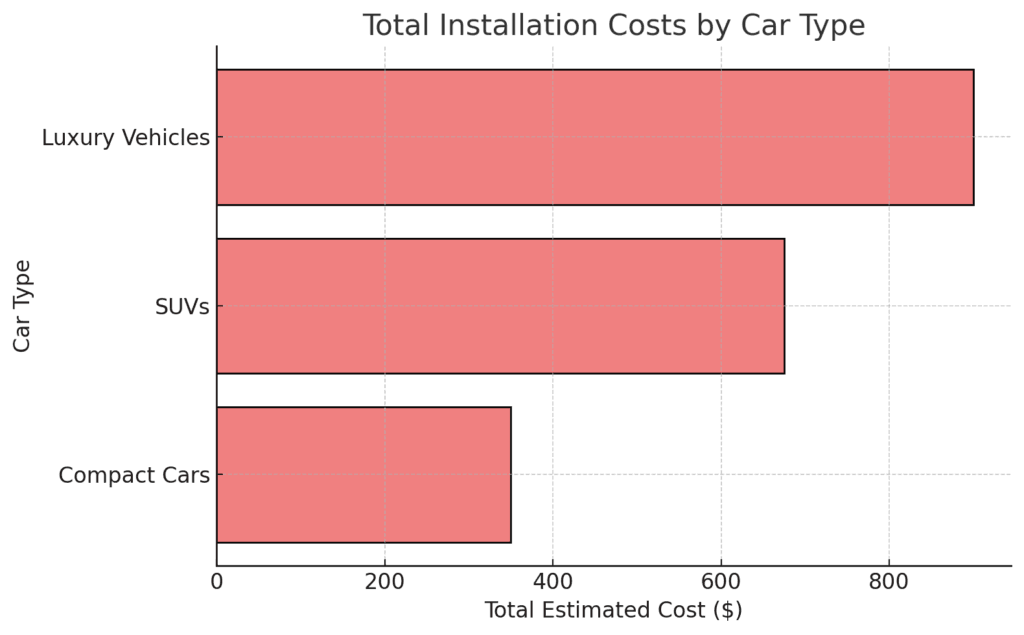
Your vehicle’s make and model significantly impact installation costs. Larger vehicles like SUVs require more material and may need custom-fit bumpers, which drive up costs. Similarly, luxury or rare car models often demand specialized labor and higher-quality materials.
| Car Type | Estimated Material Cost |
|---|---|
| Compact Cars | $50 – $250 |
| SUVs | $200 – $500 |
| Luxury Vehicles | $300 – $700 |
3. Labor Costs
Labor costs vary by region Also, the complexity of the installation:
- Urban Areas: Higher labor rates, ranging from $75 to $150 per hour.
- Rural Areas: Lower rates, typically $50 to $100 per hour.
- Specialized Work: Custom-fit bumpers or additional modifications (e.g., paint matching, sensor accommodations) can increase costs.
Installation typically takes 1 to 3 hours. Labor charges for professional services range from $100 to $450, depending on the job’s complexity.
4. Installation Type: DIY vs Professional
The choice between DIY installation and hiring a professional significantly affects your overall expenses.
- DIY Installation: This cost-effective option eliminates labor fees, leaving you to cover only the materials and tools. However, improper installation can compromise the bumper’s effectiveness.
- Professional Installation: While more expensive, professional services guarantee a secure and precise installation.
Foam Bumper Installation Cost Breakdown

To provide a clearer picture, here’s a breakdown of the typical expenses for foam bumper installation:
| Expense | DIY Cost | Professional Cost |
|---|---|---|
| Foam Bumper Material | $50 – $400 | $50 – $400 |
| Tools and Adhesives | $20 – $50 | Included in labor |
| Labor Costs | $0 | $100 – $450 |
| Total Estimated Cost | $50 – $450 | $200 – $850 |
For a basic DIY installation, costs can be as low as $50, while professional services for high-quality bumpers may reach up to $850.
DIY vs Professional Installation: What to Choose?
| Installation Type | Cost Range | Time Required | Key Benefits | Challenges |
|---|---|---|---|---|
| DIY Installation | $50 – $150 | 2 – 4 hours | Low cost, hands-on control | Requires tools and skills |
| Professional Installation | $200 – $850 | 1 – 3 hours | Precision, expertise | Higher cost, finding reputable service |
DIY Installation
Pros:
- Lower overall cost.
- Opportunity to learn a valuable skill.
- Flexibility to work at your own pace.
Cons:
- Requires tools and technical knowledge.
- Risk of improper installation leading to reduced protection.
- Time-intensive, especially for first-timers.
Professional Installation
Pros:
- Ensures proper alignment and secure installation.
- Saves time and effort.
- Ideal for custom or complex bumpers.
Cons:
- Higher cost due to labor fees.
- Requires finding a reputable service provider.
Choose DIY if you’re confident in your skills and have the necessary tools. Otherwise, professional installation is a safer bet for long-term reliability.
Tips to Save Money on Foam Bumper Installation

1. Shop Around for Materials
Compare prices across online retailers, auto shops, and local suppliers. Websites like Amazon or eBay often offer discounts on foam bumpers.
2. Bundle Services
If your car is already in the shop for routine maintenance (e.g., oil changes, tire rotation), ask if they can include the bumper installation. Bundling services may reduce labor costs.
3. Consider DIY for Basic Installations
If your car’s bumper doesn’t require customizations, DIY installation can save hundreds of dollars. Follow a reliable guide and take your time to ensure precision.
4. Request Multiple Quotes
Contact several mechanics to compare labor rates and services. This helps you find the best deal without compromising quality.
Step-by-Step DIY Foam Bumper Installation Guide
If you’re ready to install the bumper yourself, follow these steps:
Tools and Materials Needed:
- Foam bumper
- Adhesive or mounting clips
- Heat gun
- Measuring tape
- Utility knife
- Protective gloves and goggles
Installation Steps:
- Prepare the Vehicle: Remove the existing bumper, if applicable, and clean the installation area thoroughly.
- Measure and Trim: Align the foam bumper to your car and trim any excess material for a perfect fit.
- Apply Adhesive: Evenly coat the back of the bumper with adhesive or use mounting clips as instructed.
- Position the Bumper: Carefully align the bumper with the car’s body and press firmly into place.
- Secure and Inspect: Ensure all edges are secure and let the adhesive cure for the recommended time.
Estimated Time:
- 2 to 4 hours for beginners.
- 1 to 2 hours for experienced DIYers.
Benefits of Foam Bumpers: Are They Worth It?
Foam bumpers offer numerous advantages, making them a worthwhile investment:
- Safety: Minimize damage during low-speed collisions.
- Cost Savings: Prevent expensive repairs from minor scrapes.
- Durability: High-quality foam materials resist cracking and wear over time.
- Aesthetics: Enhance your car’s appearance with sleek, customized bumpers.
Conclusion: Making the Best Decision for Your Car
Installing a foam bumper is a smart move for car owners seeking enhanced protection and reduced repair costs. While the total cost ranges from $50 to $850, the decision between DIY and professional installation depends on your skills, budget, and vehicle needs.
By understanding the factors affecting installation costs and exploring money-saving strategies, you can make an informed decision. Whether you’re looking for a budget-friendly DIY project or a reliable professional service, foam bumpers are a valuable addition to your vehicle.
Invest in a quality foam bumper today and enjoy long-term safety, durability and peace of mind.
FAQs
The cost ranges from $50–$150 for DIY installation and $200–$850 for professional services, depending on material type and labor fees.
Yes, with basic tools and knowledge. However, improper installation can reduce effectiveness, so follow a detailed guide to ensure accuracy.
Polyurethane: Durable and long-lasting, ideal for heavy-duty protection.
EPP (Expanded Polypropylene): Lightweight and affordable, good for general use.
EVA (Ethylene-Vinyl Acetate): Cost-effective but less durable
DIY Installation: 2–4 hours, depending on experience.
Professional Installation: 1–3 hours, based on the vehicle and complexity.
Yes, it offers long-term savings by preventing costly repairs, enhancing safety, and maintaining your vehicle’s appearance.